Preparing the Woodwork Before You paint! Blog #3
What is your preference? Is the woodwork in your home natural wood or stained? Or is it painted already? Do you want to change the natural wood to painted wood? Prepping the woodwork is important as well as painting it. Well, let’s say you want to paint over the already painted surface. We will get to others in another blog.
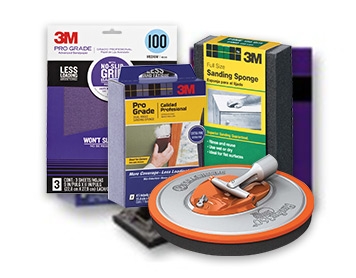
Preparing the woodwork before you paint is a little tedious but not too bad… let's look at what you have… old drips? Some dents? Some holes, streak marks from the prior painter's brush? Let's get rid of all of that! You need a nice small vibrating sander which makes it easier or a sanding blocks and a nail punch, painters putty.
Start With The Drips
Take a putty knife and a hammer and tap under the drip to take a majority of it off. This way it’s less sanding. Dents try sanding them even. DO NOT concentrate on that area too much you will make it worse. If it is easier, take a nail and your hammer and punch a hole to fill it with painters putty. By working the streaks back and forth sideways and then up and down should take those down. Do this to all the woodwork and when you finish, vacuum it all up. Preparation of woodwork before you paint will give you high points of value and satisfaction.
Vacuum Up! It's Part of The Preparation
Don’t forget to get the tops of the windows and doors, a lot of dust collects there and you want the surface to be free of dust so you don’t collect it on your brush.
Two Ways to Do the Woodwork Baseboard Trim.
You can take it off, by starting in one corner from the left and continue following it around the room. If you number it on the back you will have no problem putting it all back. You can paint these faster that way. If you are afraid to do it that way then tape off the wall with a special tape. I’ll direct you to that later. So now that you have finished prepping the woodwork you are ready to paint! The smartest way to start is with your ceiling first and then the walls.
Woodwork Painting Comes Last
If you have a ceiling fan, cover with a sheet. Light fixtures, take down the globes to be washed. OH everything is going to be so clean. Change the light bulbs while you are there on a ladder. Vacuum the fan.
OK!!! YAY!! prep work is done!!!! Vacuum whatever you can to get excess dust out of the room.
Now take whatever you don’t need anymore and get it out of the room. Use your covered surface to place your paint cans and pans for pouring or just so you don’t trip on them.
Lets Paint! The Preparing of the Woodwork is done!
Ceiling first!!! You can start anywhere on the ceiling… but work in a pattern. 2 coats should do it. Make sure the windows and woodwork around windows are protected. KEEP a damp rag with you to wipe Spreckels or drips right away! Way easier to remove NOW, then later after it dries. Before you start your walls, let the ceiling paint dry. So if you have to wait overnight, then wait overnight.
Walls
start in one corner and work your way sideways for about 3 feet, roll up and down and continue that pattern. Now here is a tip. Load your roller often, like paint 1 roll, 2 roll, 3 roll, 4 roll, load and continue loading that pattern. This way you get the paint pretty even. And when you load, make sure you roll inwards towards the paint, into the paint drag out and roll it on the pan to even the paint on the roller, repeat. Do not dip the roller into the paint and then pull out. I watch people do it all the time and they wonder why there are lines when they apply it to the surface. Use the little cigar rollers for the corners. They are great! If you are doing the ceiling and the walls the same colors, those you surely want to use! There will be so little brushing, you may not even need a ladder, just the extension pole with your little roller on there! You may have to use two pans one for the little roller and one for the regular roller. But it’s worth it!
The Easiest Way to Roll.
Trim out edges in 2 to 3-foot sections, top of the wall and bottom by the baseboard trim, with a brush or the little roller about a 4-inch width. And then use the larger roller. If you did not protect your trim, do it now. Do a second coat. Let's face it right now, a better professional job is 2 coats. And possible touch-ups. Let your painted walls dry overnight before beginning the woodwork.
Now that you know how to do The preparing of the woodwork before you paint, the next blog is the final of the series Blogs #1 through #7